Ruling Against Use of Meta Pixel - Part 3
How The Meta-pixel Works And How To Audit Your Site
In this final part of our Meta Pixel series, we dive deeper into how the pixel is working and how to audit your site. You can read part 1, where we examine the IMY’s court decisions, and part 2, where we audit how Swedish banks are currently using the pixel.
Our audit into the Meta Pixel revealed that understanding its settings can be challenging, so we took a close look at the code and features to simplify the process. This technical deep-dive concludes the series, offering a step-by-step guide to help you audit your Meta Pixel settings on your own.
Technical Deep-Dive Of The Meta Pixel
When auditing a site, we focused on three main questions:
- Is the Meta Pixel active on the site?
- Is Automatic Events enabled?
- Is Advanced Automatic Matching enabled?
To simplify the process, we’ve developed a script called “Ctrl Your Meta Pixel” which automates the audit steps - something we’ll go over later in this article.
Is The Meta Pixel Active On The Page?
To find out if the Meta Pixel is active, you can use two simple methods.
First, open your browser’s network tab and check if the file fbevent.js is being fetched from facebook.net.
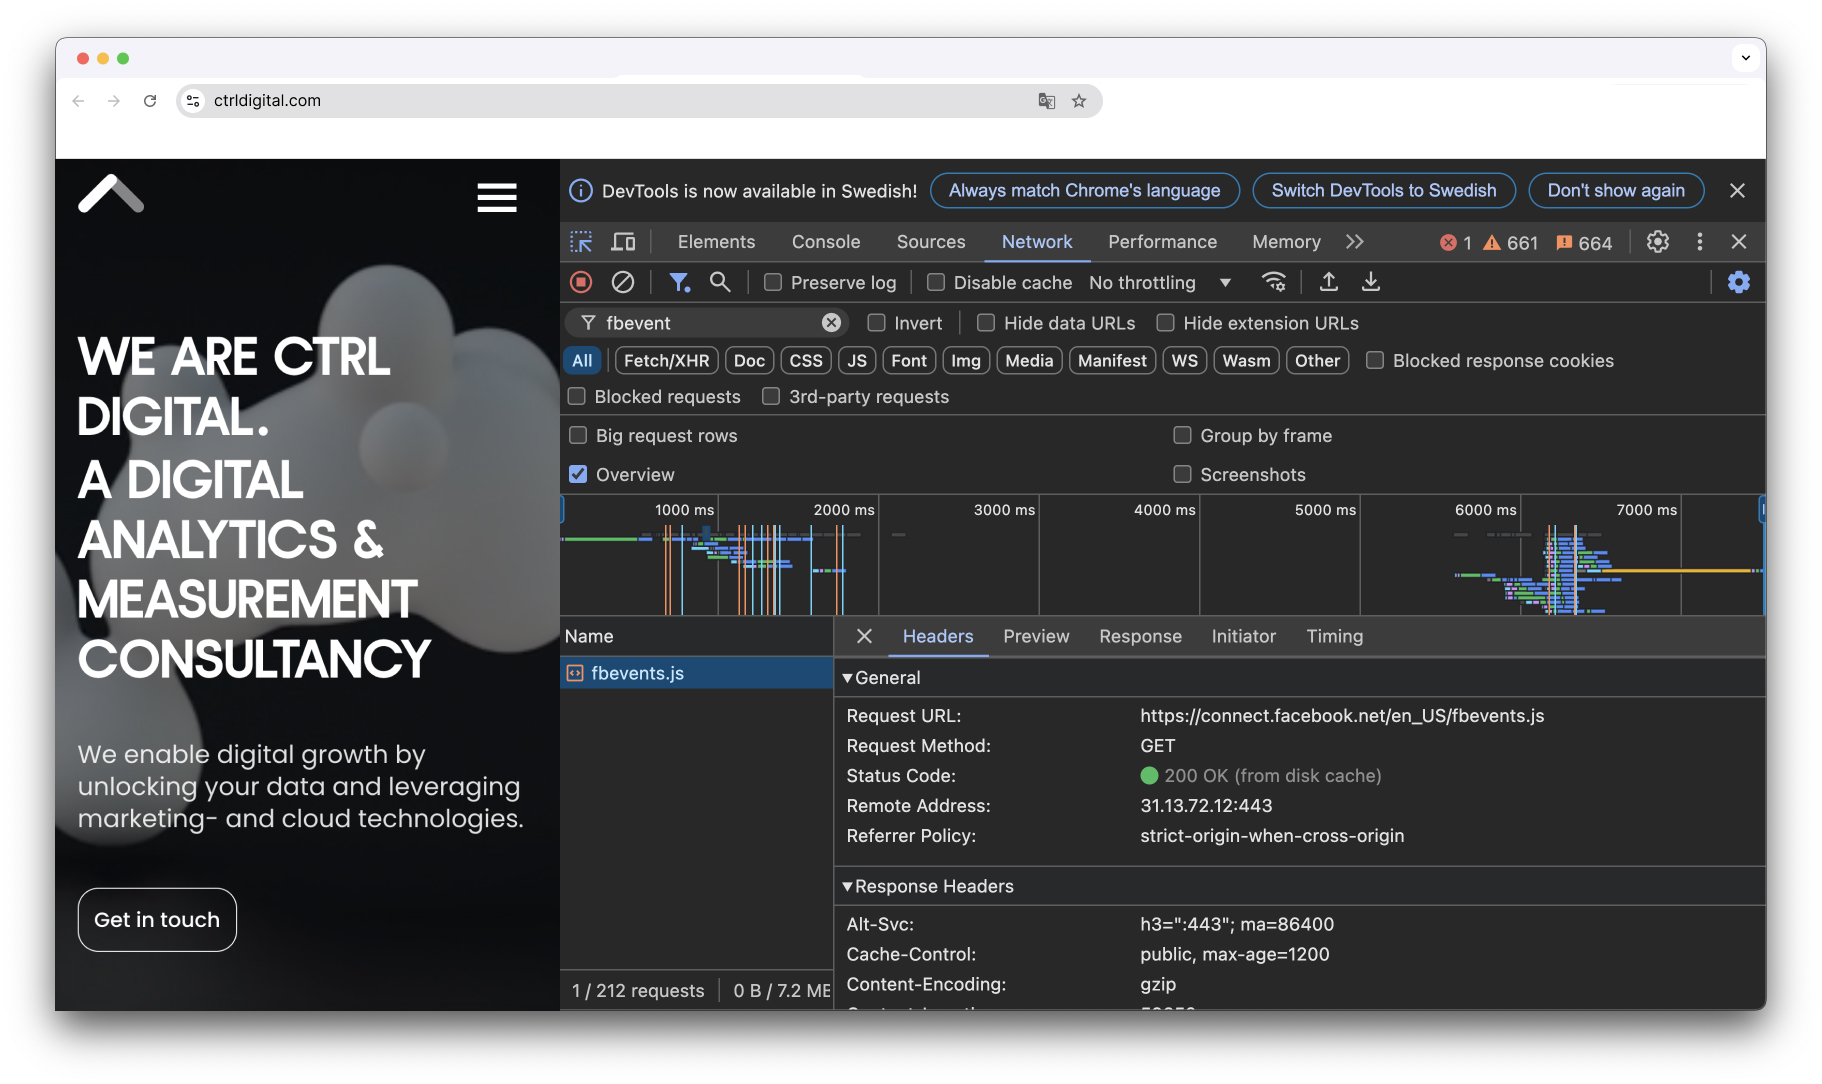
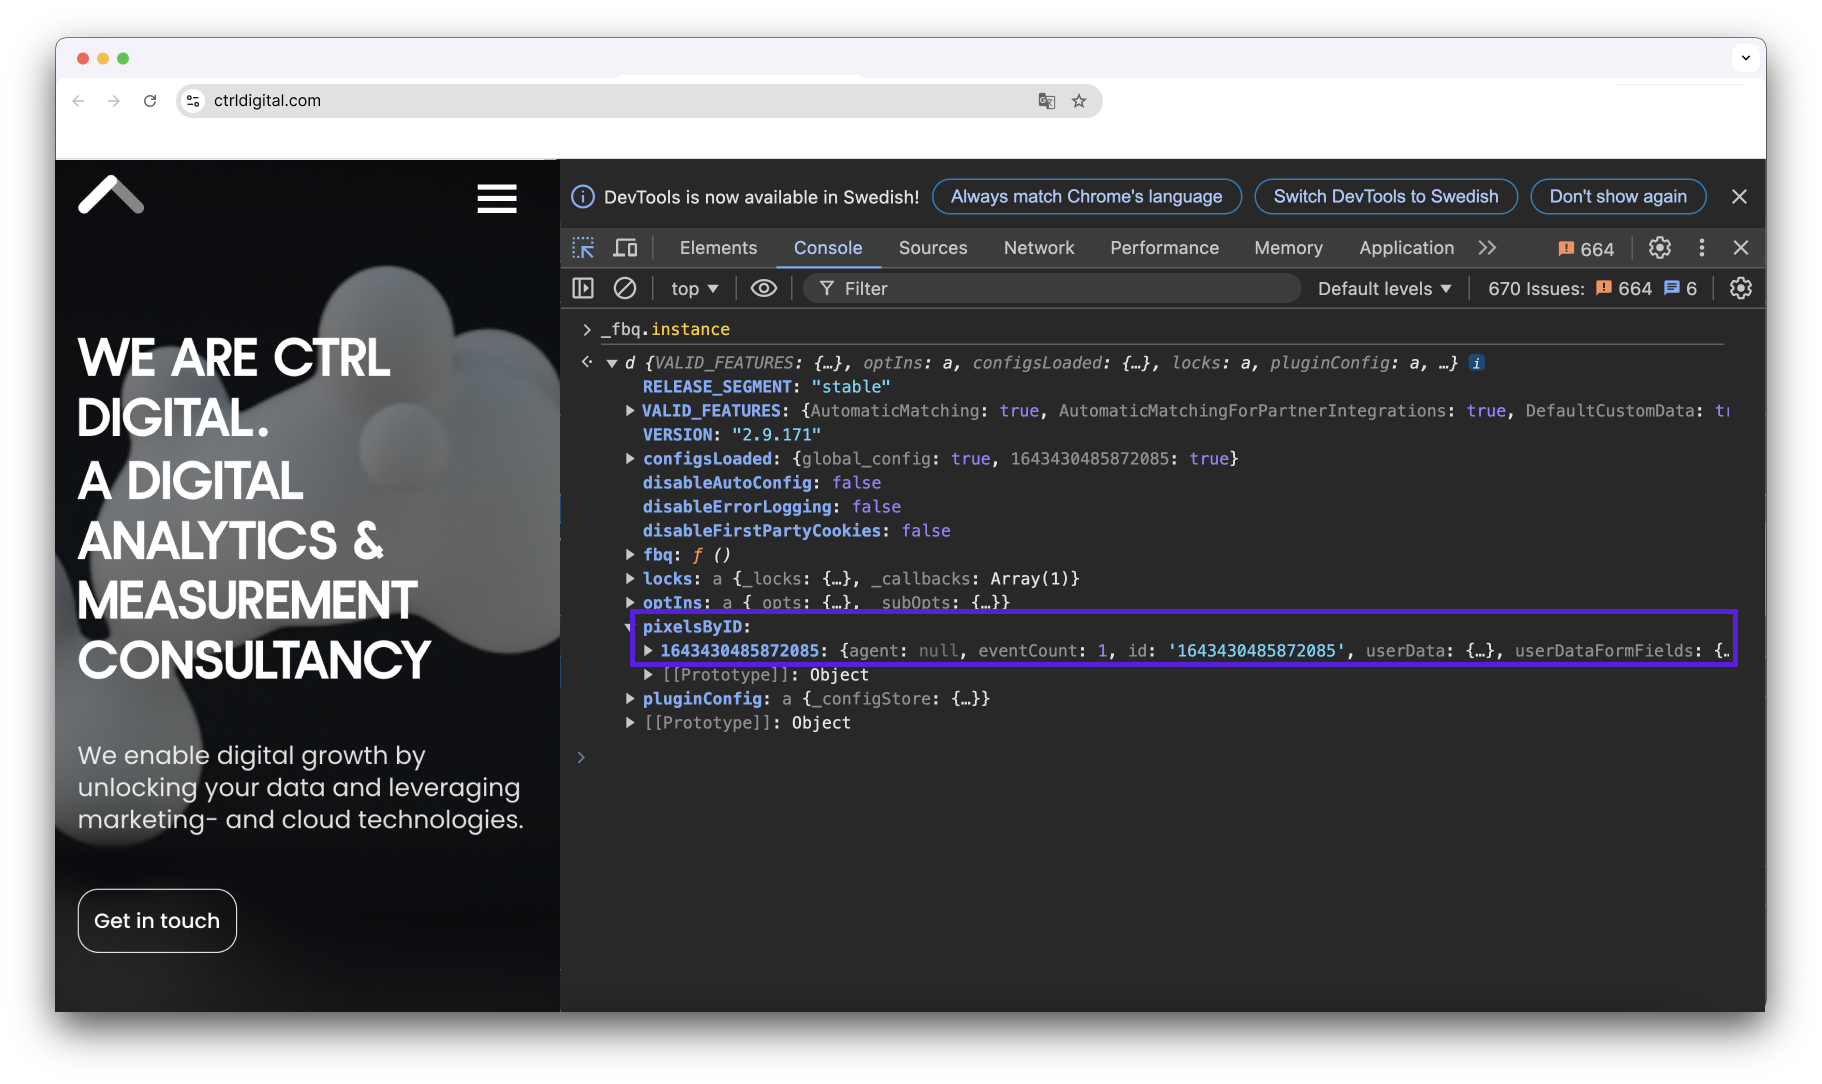
Secondly, you can use the browser’s Console. The Meta Pixel script creates an object called _fbq, which contains another object called instance. Inside, you’ll find pixelsByID, where you can view all active pixels on the site, including their IDs and any user data entered through Advanced Matching.
On this site, two pixels with different IDs were implemented.
Is Automatic Events Enabled?
Automatic Events allow the pixel to automatically detect user interactions, such as when a button is clicked. This is enabled by src and requires modification of the pixel’s code to deactivate it.
When we clicked the button “Get in touch”, the Meta Pixel automatically tracked the interaction, sending an event that included the button’s text.

How do you disable this feature?
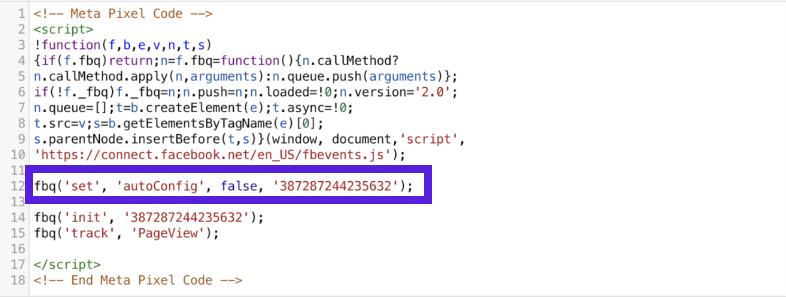
You’ll need to modify the website’s code and set autoConfig: false for the relevant pixel ID.
In the below example, we disable Automatic Events for pixel ID 387287244235632.
If you’re using Google Tag Manager (GTM), there is usually an option to disable this in the template, referred to as Automatic Configuration.

How can we verify the status of Automatic Events on our site?
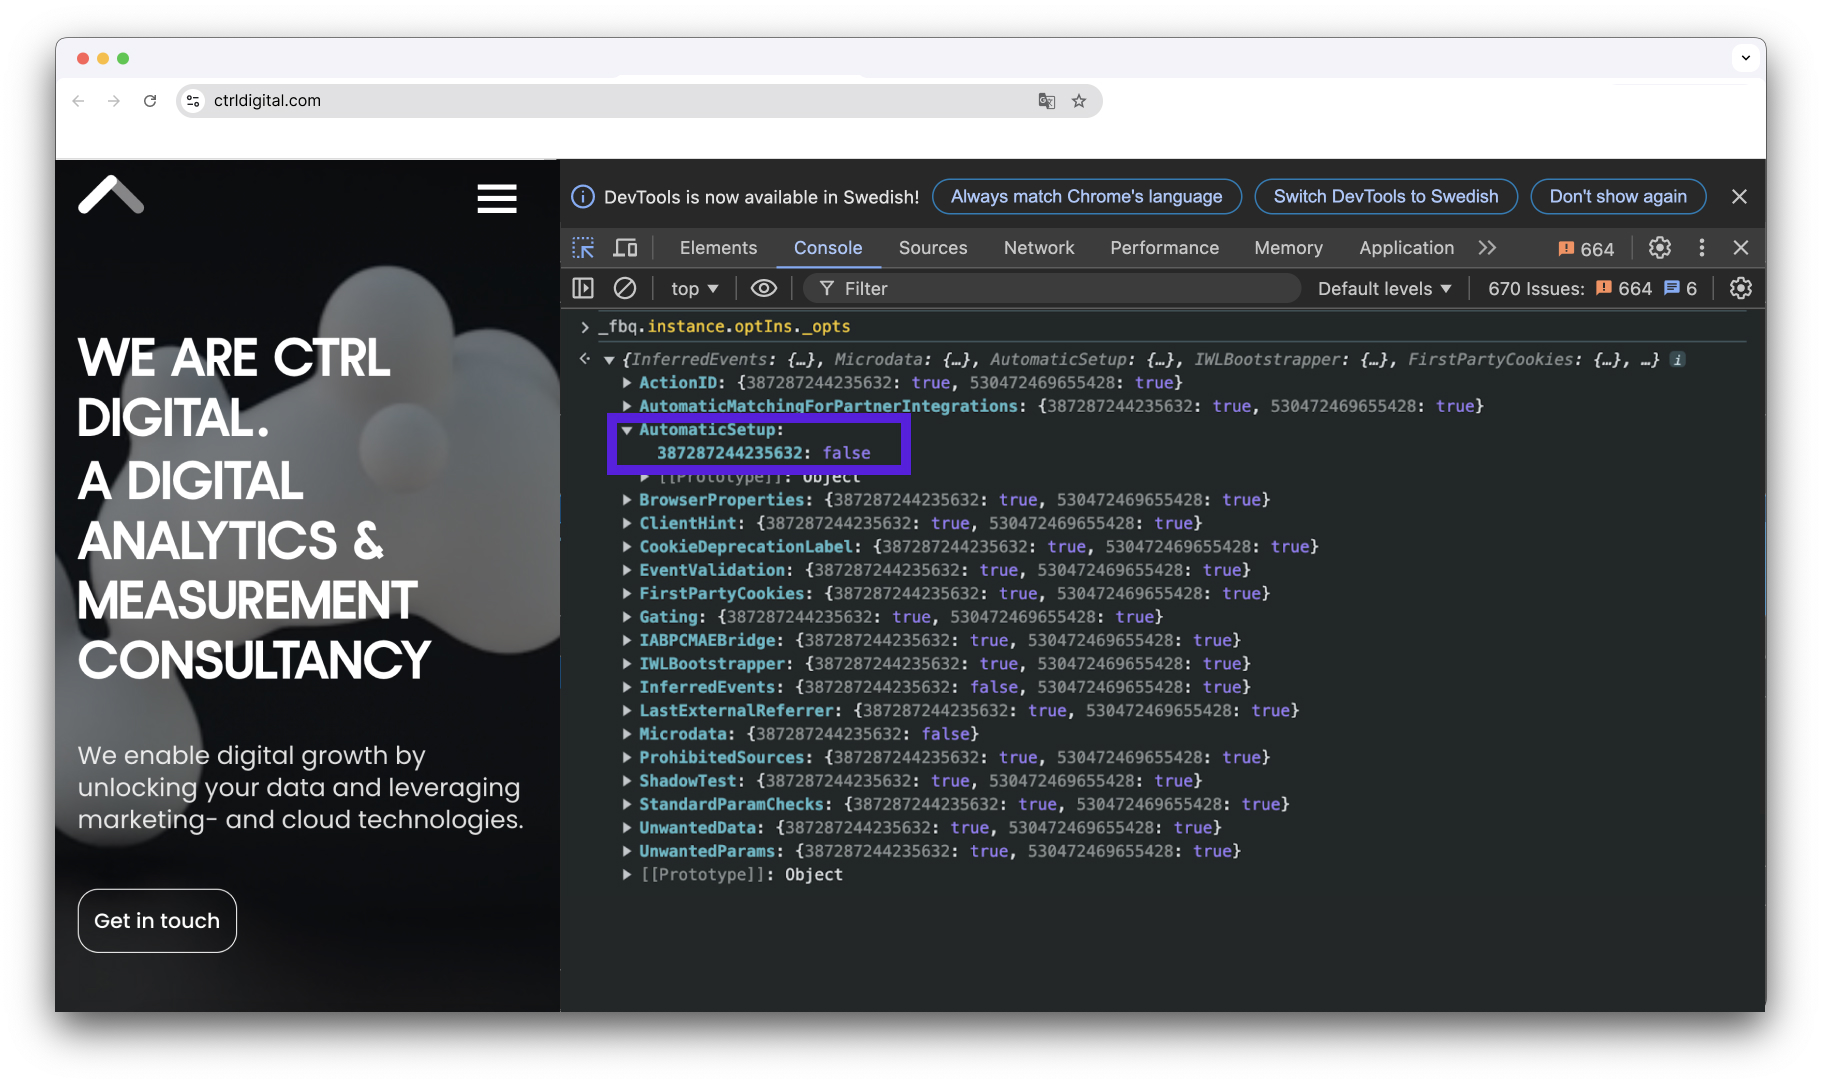
To check if Automatic Events is active on your site, enter _fbq.instance.optIns._opts in the Console. In the Automatic Setup object, we can see if there are any opt-outs for Automatic Events, and if so, for which pixel IDs. Remember, if a pixel ID is not included in this list, it means that it is active, as an opt-out is required.
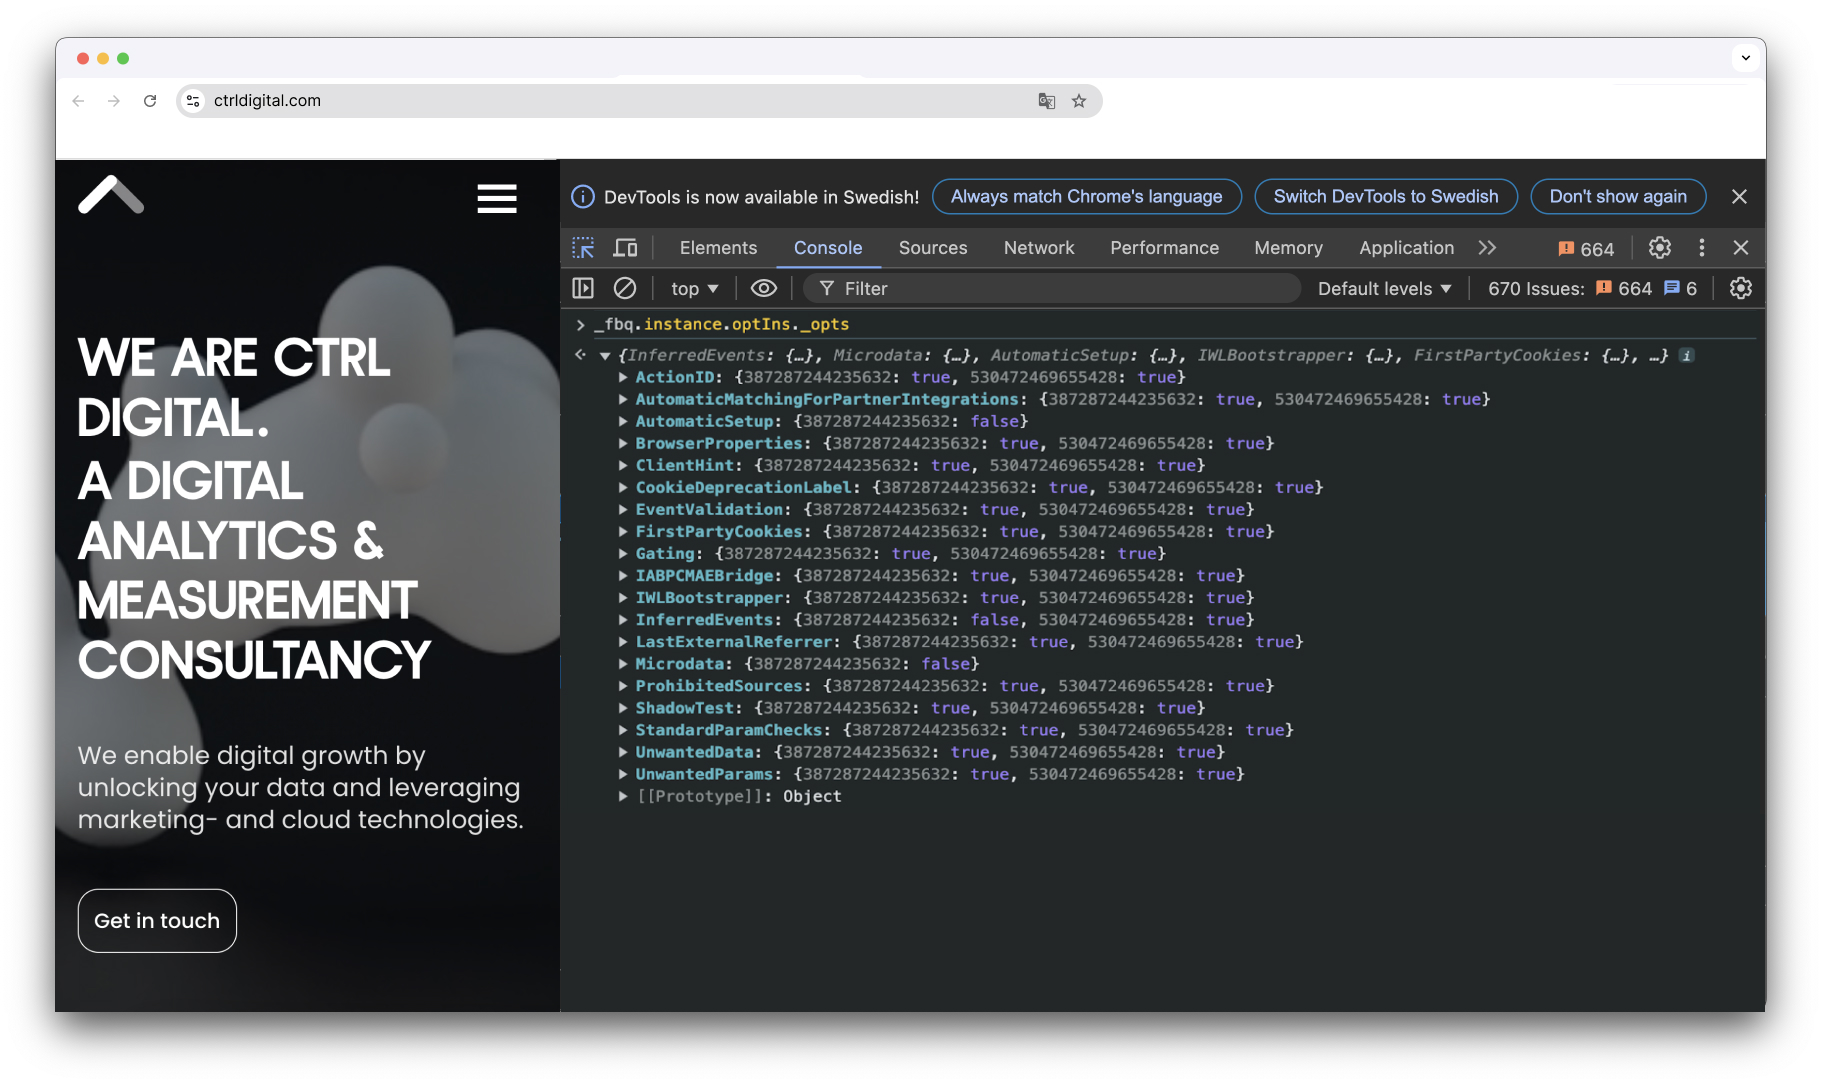
In the below case, Automatic Events is disabled for one pixel but remains active for the other since it´s opt-out is not listed.
Is Advanced Automatic Matching Enabled?
We wanted to find a way to verify whether Advanced Automatic Matching (AAM) was active on the site. While AAM can be enabled through a toggle in Meta Business Manager, the challenge was determining if we could check its status directly on the site and whether it was possible to safeguard against someone accidentally enabling it.
The first question is straightforward: no, you cannot prevent AAM from being activated through frontend code. When the pixel code is fetched, it automatically makes a request for a configuration file specific to the pixel ID. While it might be possible, with some clever “MacGyverism”, to lock the configuration and prevent AAM from being enabled, we didn’t find a simple or reliable way to achieve this.
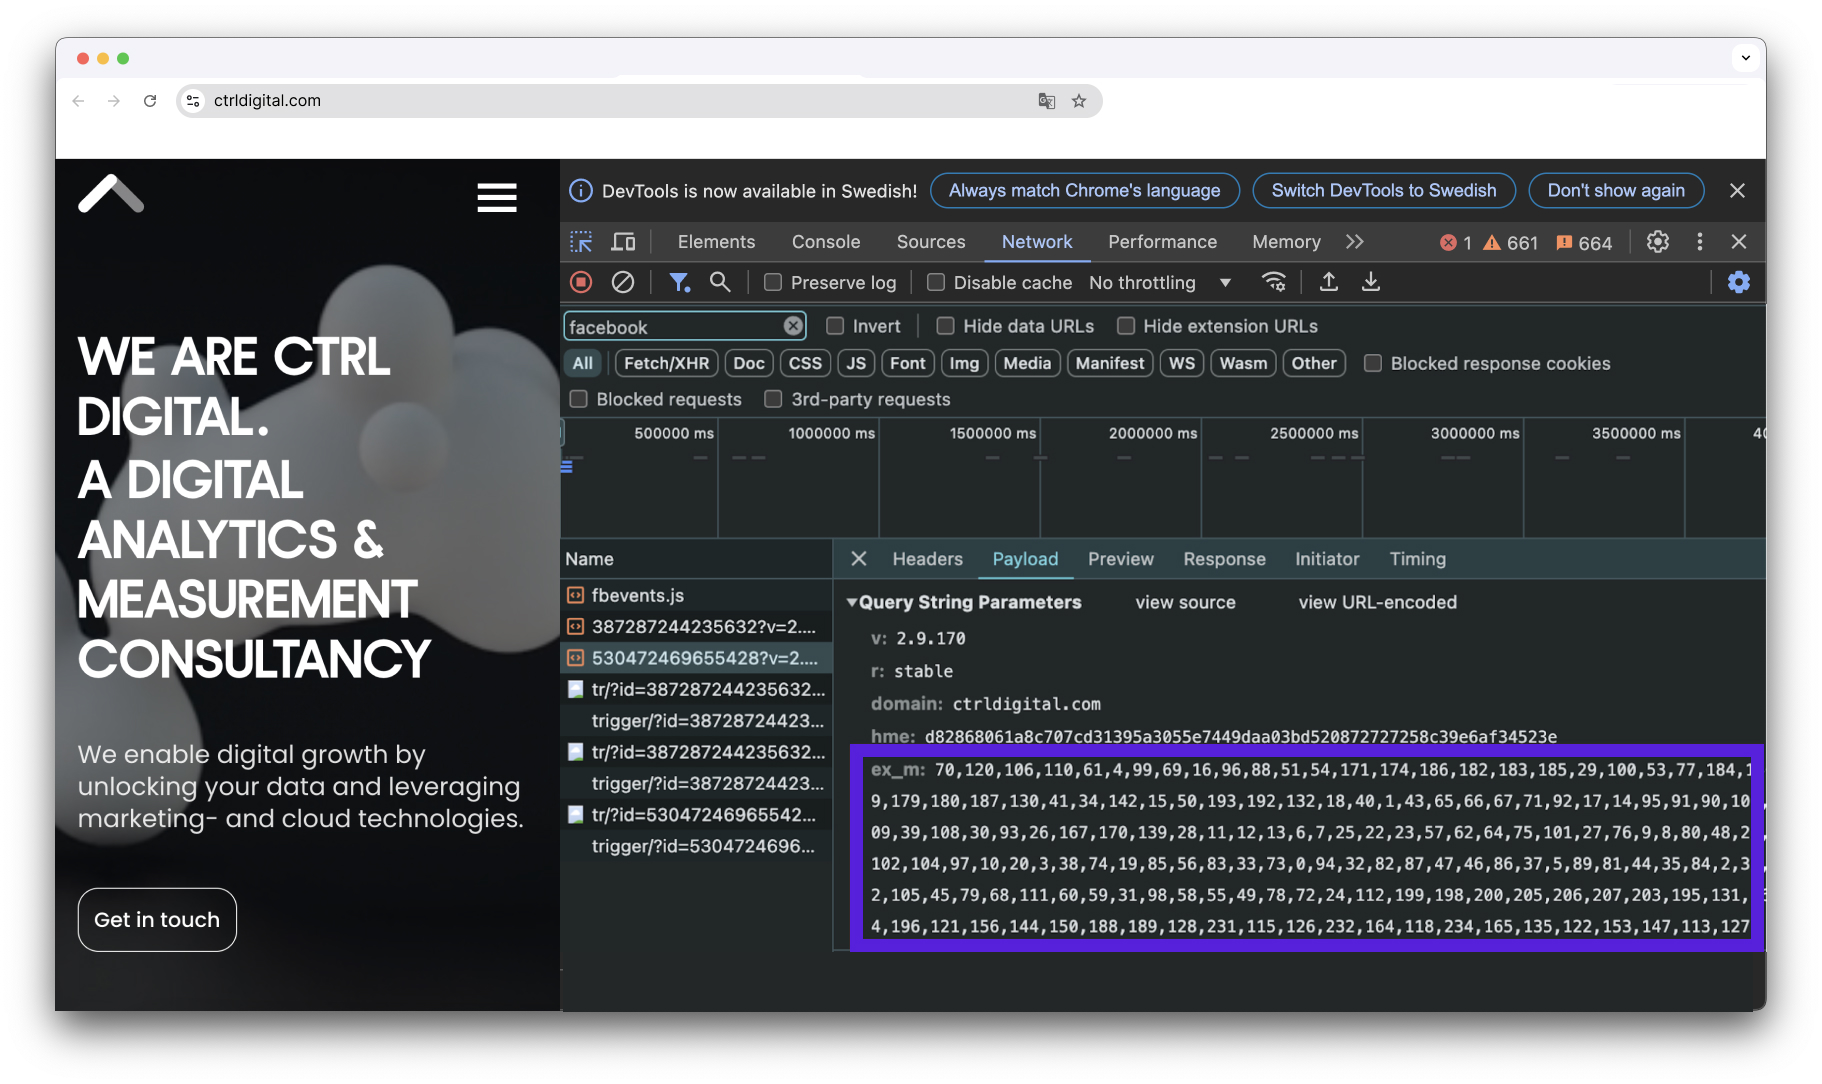
Here’s an example of a configuration being fetched from Meta Business Manager with the current settings for, for instance, AAM.
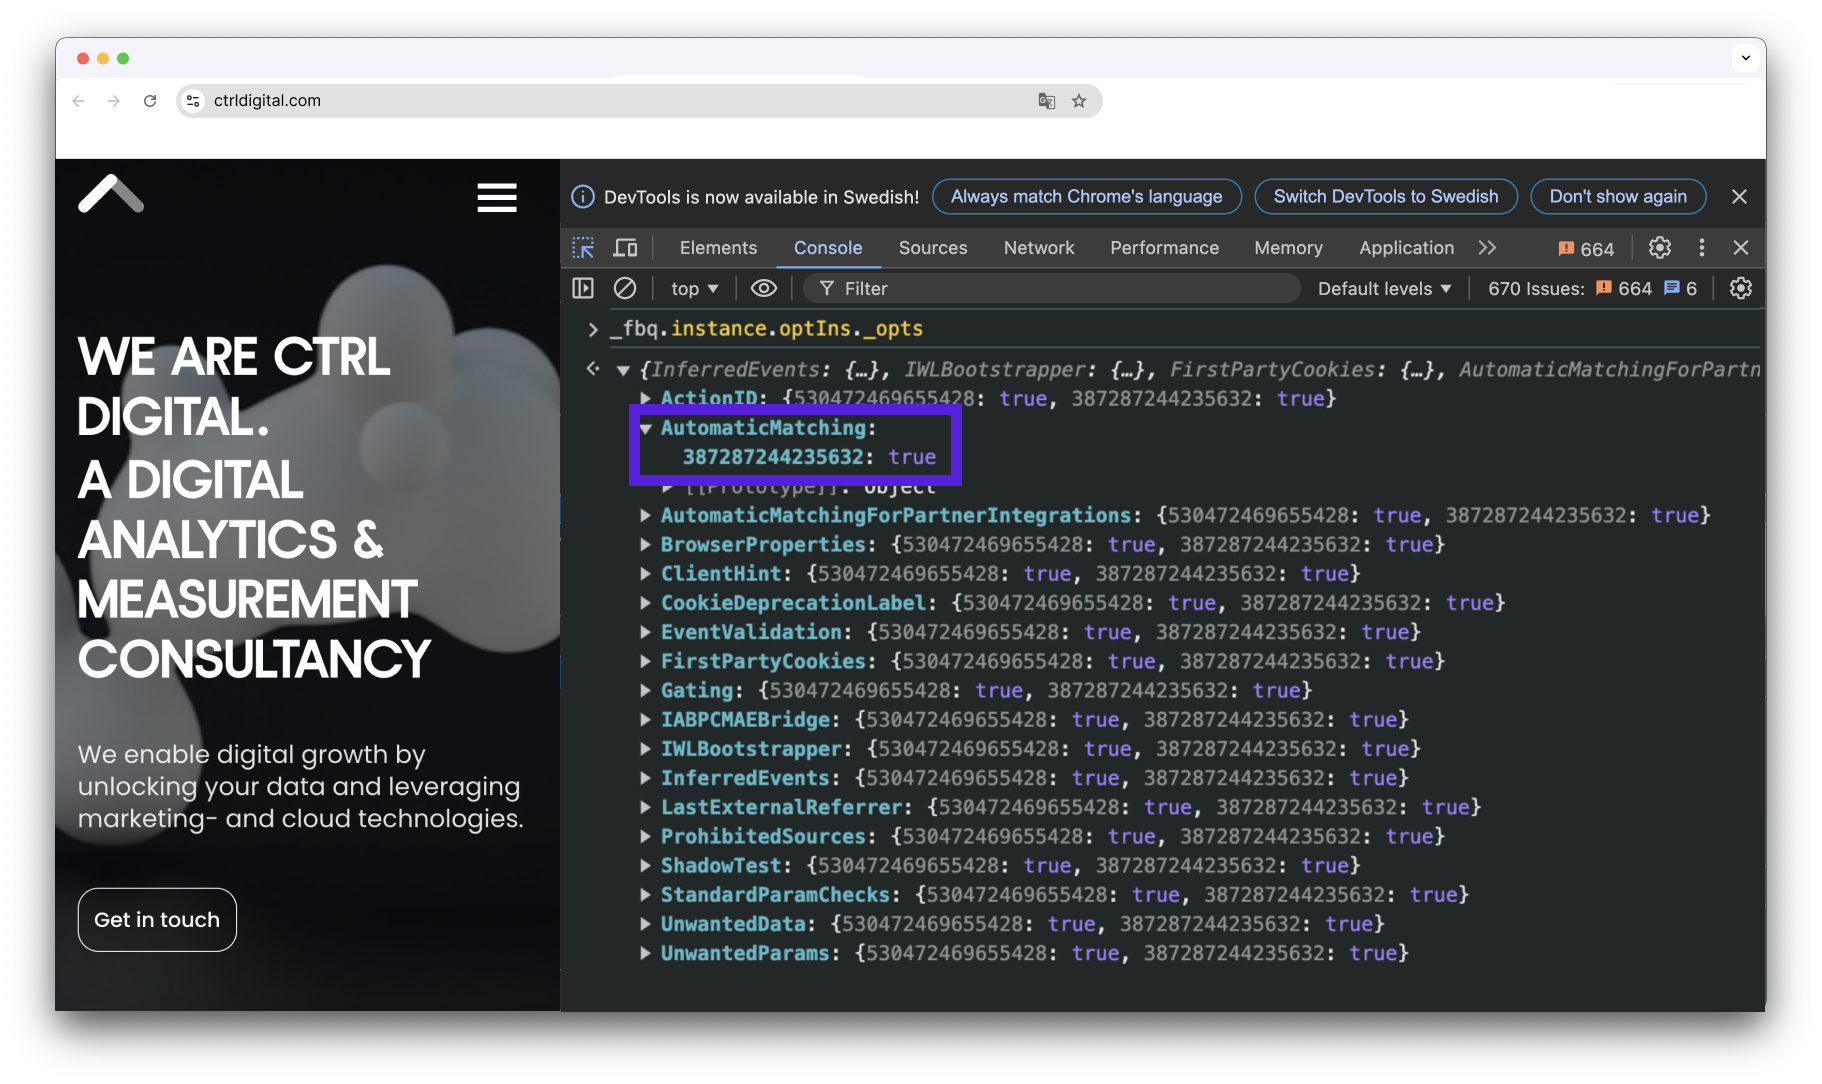
You can check if AAM is enabled by entering _fbq.instance.optIns._opts in the Console, which will show whether Advanced Matching is active for any pixel IDs. In our example, one of the pixels had AAM enabled.
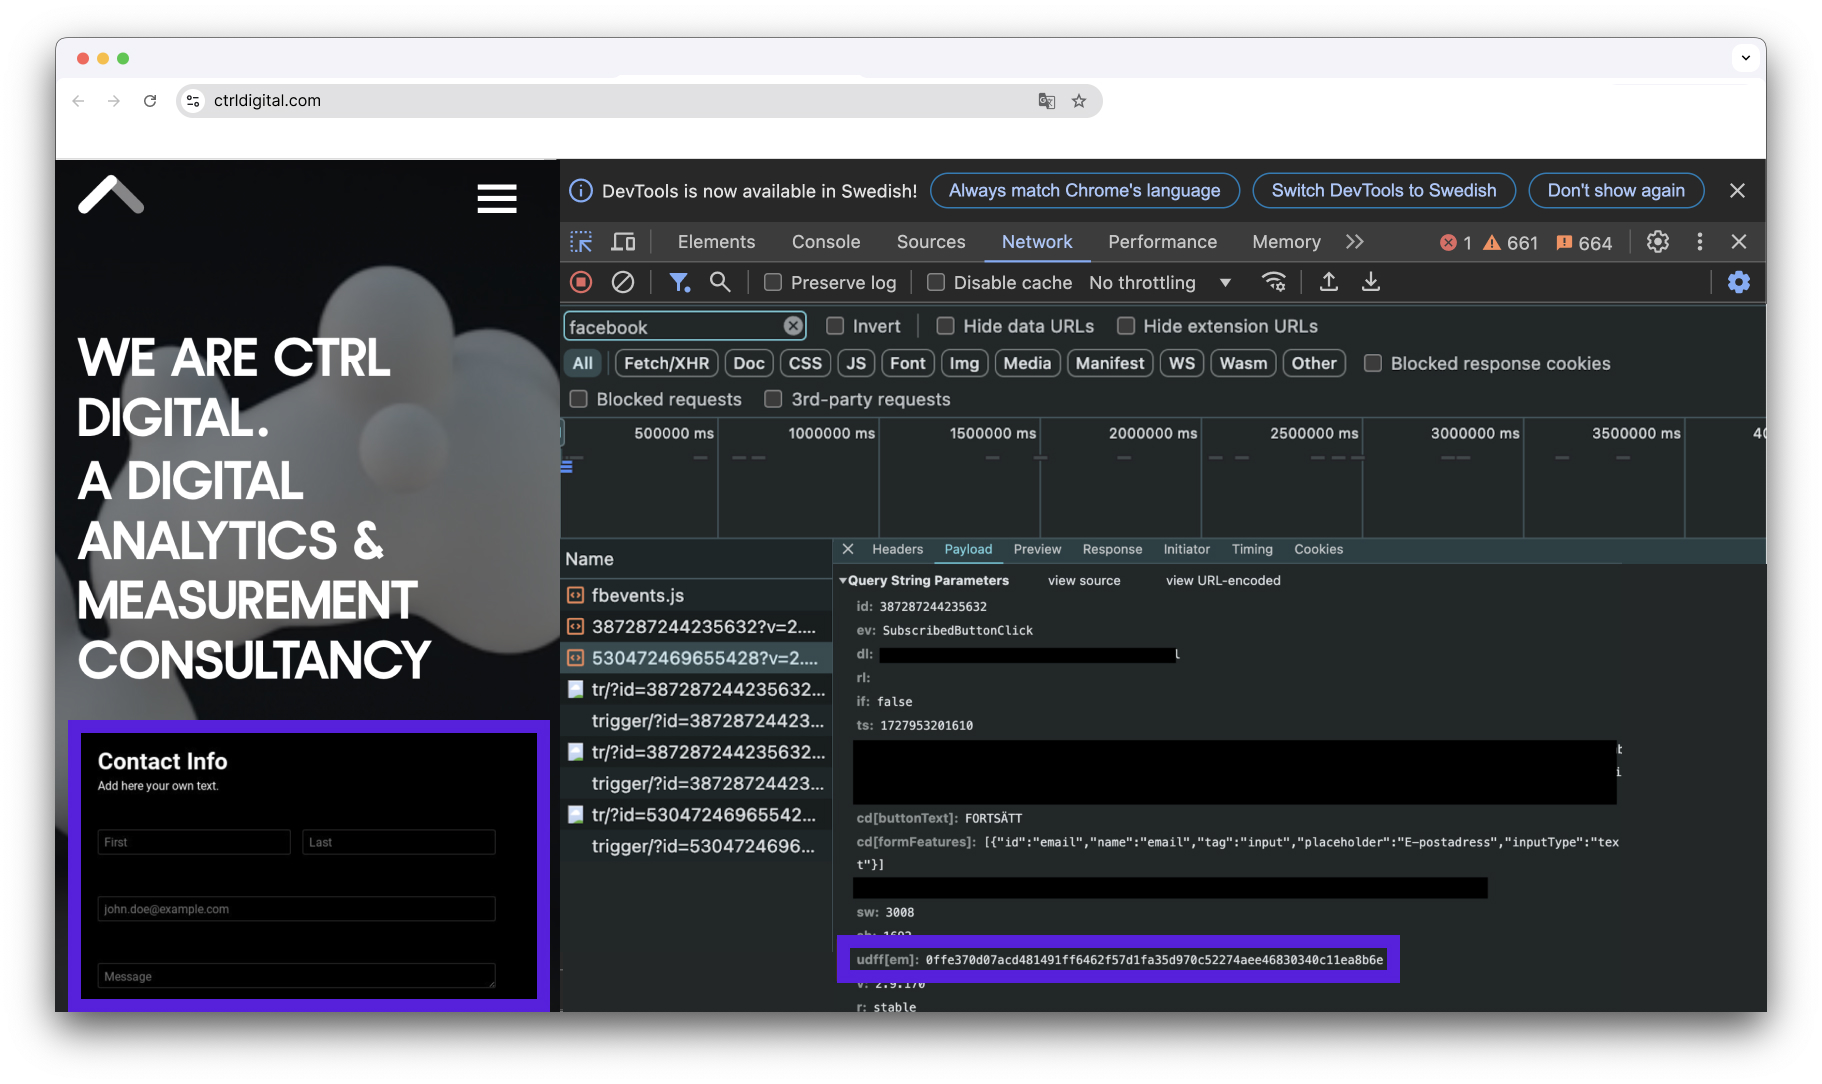
To test AAM, we entered an email address into a signup form on the site. Without any additional setup, the Meta Pixel captured the email and sent a hashed version to Meta’s server.
The parameter udff[em] contains a hash of my email [email protected].
We then use the command _fbq.instance.pixelsByID to see what our email has been loaded into the pixels instance.
By this point, we felt confident in checking the Meta Pixel configuration and understanding the effects of its different settings. The next question was to figure out how to streamline the audit process for greater efficiency.
Ctrl Your Meta Pixel
Since all the information we were looking for was available in the JavaScript object _fbq, the idea was born to create a script that fetches the settings and presents them with clear, instructional guidance - “Ctrl Your Meta Pixel” was born!
Instructions For Testing A Site
- Download the script from this repository https://github.com/ctrl-digital/ctrl-your-meta-pixel
- Open your website in a web browser.
- Open the browser’s Developer Console. On most browsers, you can do this by right-clicking the page and selecting Inspect or by pressing Ctrl + Shift + I (Windows/Linux) or Cmd + Option + I (Mac).
- In the Console tab, paste the script you downloaded from the repository.
- Hit Enter.
The script will run and check whether Advanced Matching and Automatic Events are enabled on the site. If either feature is active, you may want to review your Meta Pixel configuration to ensure compliance with privacy regulations and avoid sharing personal information unintentionally.
The script that is pasted in the Console.
![]()
An example of the output, showing the current Meta Pixel configuration along with recommended actions.
Questions?
Tracking users and sharing data with third parties can be a complex challenge when it comes to data security and compliance. At Ctrl Digital, we specialize in implementing customized tracking solutions for intricate business needs.
If you’re concerned that your site may be at risk, contact us at [email protected]. We’ll review your site and provide tailored recommendations for improvements.